Many engineers have no idea how informative concrete petrography can be. That’s too bad, because concrete petrography is one of the most useful techniques in forensic engineering. Failure analysis of concrete pavements and structures is a kind of detective work. To get the most reliable result, begin with an overview of the whole site, then focus in on the details.
It’s important to obtain representative samples of the concrete from the site, and to get large enough samples for meaningful examination. Concrete petrography is labor intensive and therefore expensive. For this reason it isn’t economically feasible to examine a statistically significant fraction of the concrete at the site. Therefore, careful selection of what you are going to examine is key.
First things first
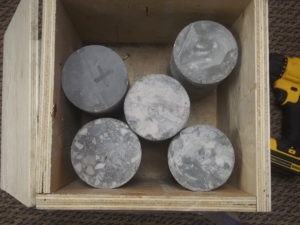
Start by examining the concrete core with the naked eye—and also with a hand lens if you like. Note the as-received condition and any distinctive features.
Improper or careless handling may cause damage that wasn’t there to begin with. That is, it’s important to document how the samples were extracted and packed for shipping. Sometimes cores arrive without packing materials to cushion them and keep them from moving around. That’s a problem because unsecured samples like these will experience damage, making it more difficult for the petrographer to identify the potential cause(s) of distress.
Ideally, the petrographer already has some information from the field investigation about the problems the concrete is experiencing. From this background and your visual examination, choose which part(s) of the core to prepare for the microscope.
Preparing specimens for concrete petrography
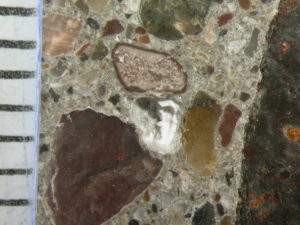
For a trustworthy result, sample preparation is critical. This usually involves cutting the specimen to obtain a representative cross-section. Polish half of the specimen with progressively finer grits. You want a smooth, planar surface to examine under a stereoscopic microscope.
Poor sample preparation may cause damage that is not easy to erase. We call this kind of damage “artifacts of preparation.” For example, a saw blade that vibrates too much can pluck out some sand grains and cementitious paste. Or a dull saw blade can generate cracks in the specimen. Either way, you have more flaws than you did when you started. To get a good surface, you’ll have to do a lot of lapping and polishing. A better choice of saw blade would minimize that damage. If the cement paste is soft, the petrographer can stabilize it first with epoxy or carnauba wax to obtain a good polish.
It takes practice and careful observation to select the best sequence of lapping and polishing. Ideally, you do just enough to remove the effects of the previous preparation step.
More is not always better. Because siliceous aggregates are harder than everything else, over-polishing will leave them standing proud, resulting in a rough surface. That’s a serious problem with an elemental analysis using an electron microscope, as the detector reads signals from the high points as stronger than those from the low points. So it will indicate that concentrations are higher than they really are just because they’re closer to the detector.
Thin sections

Thin sections are transparent slices of concrete mounted on microscope slides. They are laborious to prepare, but they are versatile and stable. Cut surfaces of concrete will interact with moisture and carbon dioxide in the air, but thin sections with cover slips remain stable for many decades. The petrographer can use the same thin section for both light- and electron microscopy, obtaining many different kinds of information. If you like, prepare thin sections from one cut surface of a concrete core and lightly polish the opposite surface to examine at low magnification.
Thin sections help us identify the mineralogy of the cement and aggregates. For example, we may want to know the mixture proportions of a concrete. Or we may want to replicate a historic mortar for the restoration of an old building. In either case, we need to identify the original constituents and mixture proportions.
Alkali-aggregate reaction and sulfate attack are easy to recognize by examining a thin section. Alkali-silica reaction gel in voids, gel plugs within fractured aggregate particles, and gel-soaked paste near reactive particles are characteristic of alkali-silica reaction. The sulfate minerals gypsum, ettringite, and thaumasite are evidence of sulfate attack.
Under the microscope

Where the telescope ends, the microscope begins. Which of the two has the grander view?–Victor Hugo, Les Miserables
Failure analysis begins with the big picture and progresses to smaller and smaller details. Similarly, concrete petrography begins with visual examination and proceeds from lower- to higher magnification. Each step sets the context for the next. That is, the larger view sets the context for the smaller details that follow.
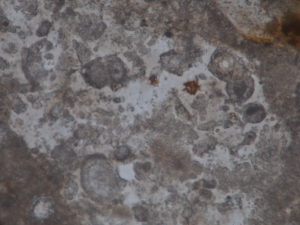
The petrographer uses several different microscopes. First, the stereomicroscope gives a low-magnification view of the concrete surface. This may be all the petrographer needs, for example to analyze the air-void system. Many features that may indicate the causes of distress become visible under the stereoscopic microscope. These include microcracking, air void content and structure, secondary deposits in voids, reaction rims around aggregate, gel-soaked paste adjacent to aggregate, paste hardness, and paste luster.
A grander view
For more detail, the petrographer uses a polarized light microscope, which can magnify up to 1000 times. Cut- and polished surfaces are suitable for both reflected light and transmitted light, but for transmitted light a thin section is necessary. However, a powder mount also provides useful information.
Polarized-light microscopy provides a means to identify the mineral constituents of the hydrated cementitious paste and aggregate. The relative quantity of unhydrated and partially hydrated portland cement clinker and residual pozzolan particles can be readily identified during the thin section examination. This information, along with the paste hardness and luster from the stereoscopic microscope, helps you estimate the water-to-cementitious ratio and degree of hydration.
A polarized-light microscope with a reflected-light attachment is useful for identifying the composition of opaque minerals such as iron oxide and sulfide minerals present in the paste or aggregates. Clinker microscopy, which uses reflected-light microscopy, is invaluable in identifying process parameters at a cement manufacturing plant. The mineralogy and morphology of the clinker minerals provides information on raw feed homogeneity, burning conditions in the kiln and cooling conditions. A problem in any part of the process can result in abnormal cement performance.
If you’re interested in learning about Beton’s petrography services, email Mark Lukkarila.
